Tracker 8 help - Cart
The Tracker cart is like the cart in an online store: items added to the cart can be edited or deleted before you place your order.
Add items to the cart from the Find and add to cart and Fast add to cart screens, with the Add to cart macro in the Items and Alerts screens or manually, by clicking the Add icon in the grid menu.
ADD ITEMS TO, EDIT ITEMS IN AND DELETE ITEMS FROM THE CART
Add items to the cart from the Find and add to cart, Fast add to cart and Item assignments screens, with the Add to cart macro in the Items and Alerts screens or manually, by clicking the Add icon in the Cart grid menu.
- Click the Cart icon in the main menu.
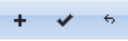
- To add a record, click the Add icon in the grid menu in the upper right corner of the grid.

- To edit, click the Edit icon. If you click in the record or the field in the record you want to edit first, the cursor will appear in that record or field.
- After you click the Add or Edit icon, the grid menu changes.
- Click the Add icon to add another record, the Save icon to save, the Cancel icon to undo any changes you've made since your last save.
- Clicking the Add or the Edit icon puts you in editing mode. Once in editing mode, you can add or edit as many records as you like but can't change your search or move to a different page until you save or cancel.
- To delete, select the record(s) you want to delete by clicking checkbox(es) in the left-hand margin of the grid (you can select more than one) then click the Delete icon in the grid menu.
PROCESS ORDERS IN THE CART
- Click the Cart icon in the main menu.
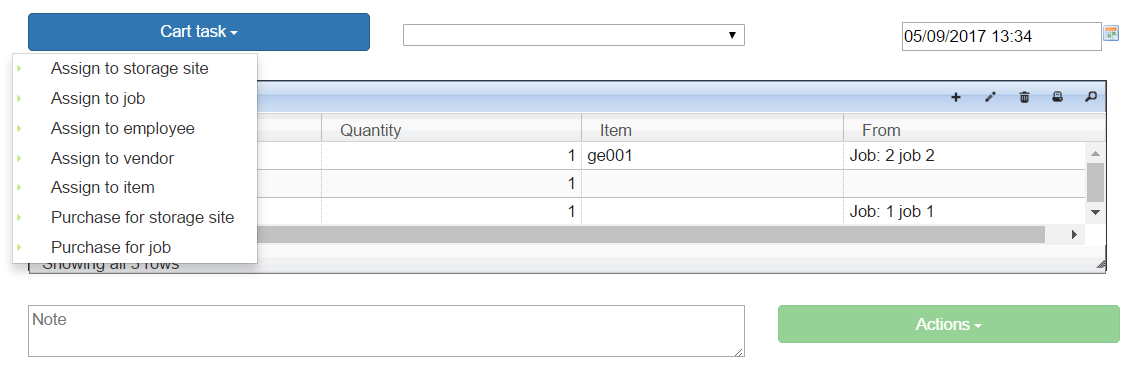
- This is the Cart on a computer. The smart phone Cart is pictured in the Intro for field users (finding and ordering with a smart phone) section of Getting started.
- Click Cart task and pick a task, for example, Assign to job if you want to assign items to a job (the options in the task list are described in Orders).

- Cart task changes to Assign to job and the dropdown to its right changes to --choose a job--. Click on the job you want. Depending on the options your organization manager has selected, you may see another optional or required dropdown for codes, employees or sub locations.
- The date in the upper right corner defaults to today but can be edited. It will be saved as the EXPECTED COMMENCE date in the Orders screen.
- Add items to, edit items in or delete items from the grid, for example, changing the quantity ordered (click the Edit icon in the grid menu to edit).
- If you enter a note in the lower left, it will appear in NOTES in the Orders grid.
- If you see a Place Order button at the bottom right, click it to record your order. If you see Actions, click it and a menu with 2 choices (Place Order and Ship) will appear.
- Placing an order in Tracker 8 is like ordering from an online merchant, who packs and ships your order. Shipping means you're moving items (you might be a warehouseman picking items for a job or a foreman sending items from one job to another).
- Your organization's Tracker manager can give different users different capabilities. Some field users, for example, might be allowed to find items but not to order or ship them. Others might be allowed to place orders but not ship.
- Orders can only be shipped if all required information has been entered (generally DESCRIPTION, ITEM and FROM, though FROM isn't required if the item hasn't been assigned previously).
- After you place or ship an order, the Orders screen opens. You can return to the Orders screen later (to check, for example, your order's status) by clicking the Data icon in the main menu then Orders - assignments.
FIELDS AND BUTTONS
- (Cart button) CART TASK until a task is selected, ASSIGN TO STORAGE SITE (job, etc.) thereafter. Your organization manager chooses the tasks listed here in Preferences.
- (Cart drop down field) primary assignment, for example, --choose a job--.
- (Cart drop down field) optional secondary assignment, for example --choose a code--.
- (Cart date field) defaults to today's date, saved as EXPECTED COMMENCE in Orders and Item history (details).
- The fields in the Cart grid can't be changed by users.
- (Cart grid) DESCRIPTION.
- (Cart grid) QUANTITY.
- (Cart grid) ITEM. The item number. Not required for orders to be placed but required for shipping.
- (Cart grid) FROM. The assignment the item is being taken from. Not required for orders to placed but generally required for shipping.
- (Cart note field) saved as NOTES in the Orders grid
- (Cart button) Labelled Place order unless the user has shipping rights, when it becomes Actions. Click Actions and a menu will appear. Click Place Order if someone else will process and ship the order. Click Ship if you're processing the order yourself (you might be a warehouseman picking items for a job or a foreman sending items from one job to another). Orders can only be shipped if all required information has been entered (generally DESCRIPTION, ITEM and FROM, though FROM is sometimes optional).