Tracker 8 help - Users
Users are people who can sign into the Tracker. Employees are people you want to track in the system (for example, you want to assign items to them). An employee can be a user but doesn't have to be. Similarly, a user can be an employee but doesn't have to be.
Users can be assigned fine-grained capabilities with user groups (listed and defined in User groups).
Every organzation using Tracker 8 has at least one organization manager. Only organization managers can add users and assign them to user groups.
Depending on the groups they're assigned to, users are classified as editing or view-only.
- Editing users can add and change data. Warehouse personnel are generally editing users.
- View-only users can look at data but can't change it. If assigned to the ORDER user group, they can order items. Field personnel are generally view-only users, as are office personnel who run Tracker 8 reports but don't need to add or edit data.
- A user with editing rights can only sign in as an editing user. A user with view-only rights can only sign in as a view-only user. You can give users who sometimes need to edit and sometimes need to view data 2 user accounts, one of each type.
When you license Tracker 8, you specify the number of editing and view-only users you want. This doesn't limit the number of users you can add to the system (you can add as many as you like). Rather, it limits the number of editing and view-only users who can sign into the application at the same time.
When a user signs in, the Tracker checks (1) the user's type (editing or view-only) (2) how many users of that type are licensed and (3) how many of that type are already signed in. If the licensed quantity has been reached, the new user isn't allowed into the application.
Train your users to sign out of Tracker 8 when not using it. If they don't sign out, they may prevent another user from signing in.
ADD, EDIT AND DELETE USERS
- Click the Utilities icon in the main menu then Users.
- To add a record, click the Add icon in the grid menu in the upper right corner of the grid.

- To edit, click the Edit icon. If you click in the record or the field in the record you want to edit first, the cursor will appear in that record or field.
- After you click the Add or Edit icon, the grid menu changes.
- Click the Add icon to add another record, the Save icon to save, the Cancel icon to undo any changes you've made since your last save.
- Clicking the Add or the Edit icon puts you in editing mode. Once in editing mode, you can add or edit as many records as you like but can't change your search or move to a different page until you save or cancel.
- To delete, select the record(s) you want to delete by clicking checkbox(es) in the left-hand margin of the grid (you can select more than one) then click the Delete icon in the grid menu.
- The user groups you add in the User groups subgrid determine the new user's capabilities. You're not required to add any, but a user with no groups can only change his or her passwords and modify his or her user preferences.
View-only users can be in any or all of the FIND, ORDER and VIEW groups. Field users are generally in the FIND group (which allows them to search for items in the Find and add to cart screen) and are often in the ORDER group (which allows them to order items in that screen). Users in a VIEW group can see (but can't edit) jobs, items and other data.
Users in any of the SHIP, ADD AND EDIT or DELETE groups are editing users.
'Ship from home base' and 'Ship to/receive at home base' haven't been implemented (yet).
Duplicating an existing user with the same (or almost the same) user groups is faster than entering a new user from scratch.
DUPLICATE AN EXISTING USER
- Click the Utilities icon in the main menu then Users.
- Select the user you want to duplicate.
- Click the Tools icon in the main grid menu, Macros then Copy user and groups.
- Replace the new user's LOGIN and EMAIL. Optionally add a FIRST NAME and LAST NAME and edit the user's groups.
EMAIL A TEMPORARY PASSWORD TO A NEW USER
- Click the Utilities icon in the main menu then Users.
- Select the user you want to email.
- Click the Tools icon in the main grid menu, Macros then Email temporary password to send the new user an email with sign in instructions and a temporary password.
RESET A USER'S PASSWORD
Users can reset their own passwords with the Change password option in the main Utilities menu or by clicking Forgot your password? in the Sign in screen. But, if necessary, an organization manager can reset a user's password.
- Click the Utilities icon in the main menu then Users.
- Select the user you want to email.
- Click the Tools icon in the main grid menu, Macros then Reset temporary password.
- Click the Tools icon in the main grid menu, Macros then Email temporary password to send the new user an email with sign in instructions and a temporary password.
FIELDS
- (Users grid) FIRST NAME and LAST NAME are optional.
- (Users grid) LOGIN (the sign in id) and EMAIL are required.
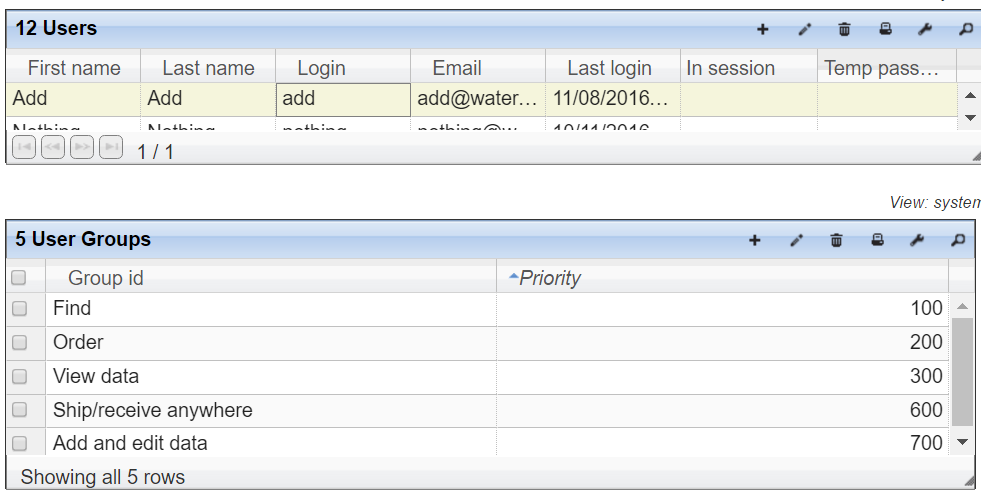
- (Users grid) LAST LOGIN, IN SESSION (checked if the user is currently signed in) and TEMP PASSWORD are managed by the system.
- (User Groups grid) GROUP. Available groups are listed and defined in User groups.
- (User Groups grid) PRIORITY. A view-only user's groups are all priority 399 or less. An editing user has 1 or more groups with priority 400 or greater.
MACROS
- (Users grid) EMAIL TEMPORARY PASSWORD. Email a temporary password to the selected user.
- (Users grid) RESET TEMPORARY PASSWORD.
- (Users grid) COPY USER AND GROUPS. Duplicates an existing user.