After you sign up (or your organization signs you up) for Tracker 8, you'll receive an email with sign-in instructions. You don't need to install anything (unless you want to read barcodes with a smart phone).

IF YOU'RE FAMILIAR WITH TRACKER 7, read Tracker 8 for Tracker 7 users in the Tracker 8 screen.

IF YOU'LL USE A SMART PHONE OR TABLET TO FIND AND ORDER ITEMS, scroll down and read Main menu, Using Tracker 8 help, Find items and Order items.

IF YOU'LL PROCESS ORDERS AND SHIP ITEMS, read Find and add to cart, Fast add to cart, Items and Cart and Orders screens.

IF YOU'LL ADD AND EDIT DATA (items, jobs, employees, etc.), scroll down and read Add, edit and delete data and Grids.

IF YOU'RE A TRACKER 8 ORGANIZATION MANAGER, you can add users, set organization preferences and define reports, searches, sorts and views everyone in your organization can use.

  • Read about users then add yours and assign them to user groups. Click the Tools icon in the grid menu, Macros then Email temporary password to email them sign in instructions and temporary passwords.
  • Read about preferences then enter yours. Your users might appreciate help with their user preferences, especially their Default screen. If you plan to use a portable barcode reader, set your organization's default site in the Organization preferences tab. If you have more than one storage site and want different users to have different default sites, have your users enter their default site(s) in User preferences.
  • Read about searches. If some of your users will use the 'Find and add to cart' screen and that screen loads slowly, a default search will speed it up.
  • Take a look at views, sorts and reports and add any important organization-level customizations (it's easy to add more, later).

IF YOU'RE ENTERING YOUR DATA FROM SCRATCH, ENTER IT IN THIS ORDER (if you have data in a spreadsheet, you can import much of it).

CONTACT US if you have questions or want to schedule training.

To get to the help page you want ...

  • If you see Tracker 8 help in the main menu, click it and the Help - Contents page will open. Links to Tracker 8's help pages are organized in the Help - Contents page by menu. If, for example, you want help with jobs, click Data under MAIN MENU then Jobs.
  • If you see the Help icon in the main menu, click it and you'll be offered two choices: help for the page you're on and Help - Contents.
  • You can also search for help by entering the words you're looking for in the search field in the upper right corner of any help page and pressing Enter on your keyboard.

Help pages contain panels that can be toggled open or closed. Click a panel's title, for example, Using Tracker 8 help or Find items in this screen, to toggle that panel open or closed. Click Toggle all in the upper right corner of the top-most panel to open all the panels that are closed and close all the panels that are open.

Help pages open in a new tab in your browser. To return to Tracker 8, click on its tab or close the help tab.

You may not see all the options and choices described in the help system in your copy of Tracker 8. What you see depends on the rights assigned to you by your organization's Tracker manager and the Tracker options your organization has selected.

With Tracker 8, you can use a smart phone, tablet or computer to find the items you need. The instructions in this panel are for a smart phone or tablet running the Tracker's find and add to cart screen (click here if you're using a computer).

If you're an experienced Tracker 7 user or are familiar with your organization's item numbers and descriptions, we recommend using the Tracker's fast add to cart screen to find and order items.

  • Touch the Find and add to cart icon in the main menu (at the top of the screen) to open the find and add to cart screen.

  • Mobile find order default search screen

  • If someone's set up a default search, a screen like this may appear (you can change or get rid of this, see searches). Fill in one or more fields and click OK.

  • Mobile find order screen

  • You may not see all these icons in your copy of Tracker 8. What you see depends on the rights assigned to you by your organization's Tracker manager and the Tracker options your organization has selected.

  • The number to the right of each description is the number of items that match the current search.

  • Data are spread across pages: 3/7 (near the top, to the right of 'Find and add to cart') means that page 3 of 7 is displayed. Touch the icons at the bottom to navigate between pages: takes you to the first page, the previous page, the next page and the last page.

  • You can refine your search by typing in the Search descriptions field. The search looks for descriptions that contain the characters you type, for example, descriptions that contain the letters 'ge'.

  • Mobile find order search

  • Drill down to the next level by touching to the right of a description. In the example below, drilling down shows us that all 3 of our generators are assigned to our default storage site. Note that the search field changes, in this case to Search assignments, to match the level we're on.

  • Mobile find order screen

  • Touch at the top to return to the previous screen, to drill down further and see specific items.

  • Our examples so far have been grouped by description then assignment. This grouping is ideal if you want to know where all the items with the same description are (if, for example, you want to know where all your generators are). But if you want to see what's at an assignment (for example, a job), touch the tool icon in the menu at the bottom of the screen then Group by assignment then description.

  • Mobile find order screen

  • Now assignments are at the top level.

  • Mobile find order screen

  • Drill down to see the descriptions at an assignment. Below, for example, is a list of everything assigned to truck 26.

  • Mobile find order screen

For additional options and more detail, check out the help pages for the Find and add to cart, Fast add to cart and Items screens.

Ordering items in Tracker 8 is like ordering from an online store: you find the items you want, add them to your cart then place your order.

You can add items to your cart from several screens, including Find and add to cart and Fast add to cart. These instructions are for the Find and add to cart screen on a smart phone or tablet.

  • Find the description you want and touch the cart icon to its right to add it your cart.

  • Mobile find order search

  • After adding items to your cart, touch the cart icon in the main menu to open the Cart screen.

  • Mobile cart task

  • Touch Cart task and pick a task, for example, Assign to job if you want to assign items you have in stock to a job (the options in the task list are described in Orders).

  • Another button will appear, prompting you to enter the assignment you're ordering for.

  • Mobile cart choose job

  • Touch Place Order at the bottom to record your order.

  • Mobile cart place order

  • If you see Actions instead of Place Order, touch Actions and a menu will appear with 2 choices: Place Order or Ship. Place Order means someone else (often a warehouse manager) will fulfill the order. Ship means you're fulfilling the order yourself, for example, you're a warehouseman pulling items for a job or a foreman sending items from one job to another.

  • After you place or ship an order, the Orders screen opens. You can return to the Orders screen later (to check, for example, your order's status) by clicking the Data icon in the main menu then Orders.

  • Mobile cart place order

For additional options and more detail, check out the help pages for the find and add to cart, fast add to cart, cart and orders screens.

Click the Data or Utilities icon in the main menu then the screen you want.

To add a record, click the Add icon in the grid menu in the upper right corner of the grid.

Grid menu

To edit, click the Edit icon. If you click in the record or the field in the record you want to edit first, the cursor will appear in that record or field.

After you click the Add or Edit icon, the grid menu changes.

Grid menu when editing

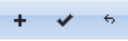
Click the Add icon to add another record, the Save icon to save, the Cancel icon to undo any changes you've made since your last save.

Clicking the Add or the Edit icon puts you in editing mode. Once in editing mode, you can add or edit as many records as you like but can't change your search or move to a different page until you save or cancel (pages are explained in the Grids section of this help overview).

To delete, select the record(s) you want to delete by clicking checkbox(es) in the left-hand margin of the grid (you can select more than one) then click the Delete icon in the grid menu.

New tools, equipment and supplies ("items" in Tracker 8) are a special case.

While you can add new items with the Add icon, you'll have to switch to other screens if you want to add a new description, rate type or maintenance schedule, assign the item or record the item's cost. The NEW ITEM WIZARD and DUPLICATE ITEM WIZARD do all that for you.

  • Click the Data icon in the main menu then Items.
  • If you want to duplicate an existing item, select it in the Items grid.
  • Click the Tools icon in the grid menu, Macros then either Duplicate item wizard or New item wizard.
  • Follow the prompts. The data you enter isn't saved until you click Save in the last screen.

See items for more detail and additional options.

With the exception of a few frequently-used smart phone and tablet screens (like those pictured in the Find items and Order items panels of this help page), Tracker data are displayed in grids like those shown below.

Grid with subgrid

The current view is displayed above each grid on the right. If a saved or special purpose search or sort are active, they're also displayed.

Grid view search sort

Searches and sorts don't need to be complicated. Quick searches are described in search. To sort quickly, click on a column heading: the first click gives you an ascending sort, the second, a descending sort.

A view is a customizable selection of columns or fields. You can have several views of the same table, each with different columns.

If you have the required user rights, you can add and edit your own user views, sorts, searches and reports. You can also specify the default view, sort and search used the first time you open a screen.

The grid menu is in the upper right corner.

Grid menu

Data are usually broken into pages of 50 rows (you can change that number in user preferences). This improves system performance by retrieving just a page of data at a time. Page controls are in the lower left corner.

Grid page controls

  • If a grid contains more than one page, click one of the icons in the lower left to display the first, previous, next or last page.
  • The numbers (2/9 in this example) tell you which page you're on and how many pages there are.

You can temporarily modify most grids by manipulating column headings. Temporary modifications last only as long as the grid is open. For permanent changes, create or edit a view.

  • Change a column's width by dragging its heading's right border.
  • Change a column's sequence by dragging its heading to the left or right.
  • Remove a column from the grid by right clicking on any heading and unchecking the column you want to remove.

  • Grid header